
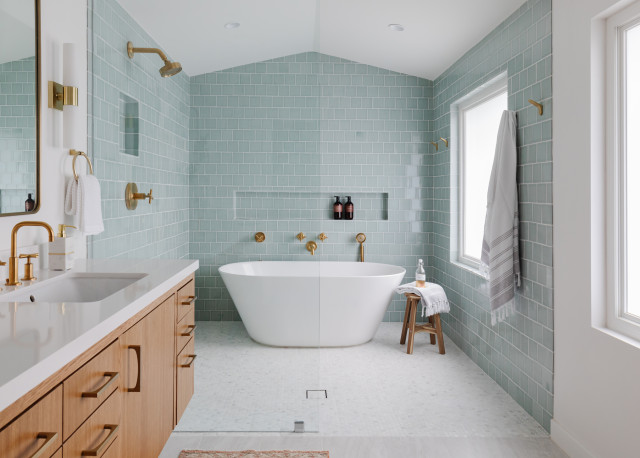
Not only is remodeling your bathroom an exciting project, but it also represents a sizable investment in your house. A successful project depends on careful planning, whether your goals are to modernize the style, improve functionality, or raise the value of your home. We’ll take you step-by-step through the entire bathroom remodel planning process in this comprehensive guide, from goal-setting to material and fixture selection. By the end, you’ll be confidently prepared to start this fulfilling journey.
Step 1: Establish Your Budget and Goals
Assess Your Requirements:
Start by evaluating and noting the shortcomings of your existing bathroom. Do you want to create a tranquil haven that resembles a spa? Do you require more room for storage? Is it time to upgrade old fixtures to more energy-efficient models? Knowing what you need will help you decide how to proceed with your project.
Determine a Reasonable Budget: Assemble a financial plan for your bathroom renovation. Take into account elements such as labor, supplies, fixtures, and unforeseen costs. To make sure that the financial aspects of your project are handled properly, you must have a well-defined budget.
Step 2: Inspiration and Research
Collect Thoughts:
Look through periodicals, webpages, and social media sites such as Pinterest and Instagram to get ideas. Make a mood board or folder containing pictures and graphic elements that speak to you. This will assist you in communicating your ideas to your contractor or designer.
Examine Various Styles: There are many different styles of bathrooms, ranging from traditional and vintage to modern and minimalist. Investigate various design philosophies to find the one that best suits your tastes and the overall aesthetic of your house.
Step 3: Measure Your Bathroom and Assess the Space:
Measure Your Bathroom:
Precise measurements are essential for organizing the space and choosing fixtures and components. Measure your bathroom’s length, width, and height as well as the locations of the current electrical and plumbing connections.
Think About Layout Changes: Determine if you want to move the vanity, shower, or toilet, among other layout adjustments. Remember that changing the layout can have a big effect on the project’s budget and schedule.
Step 4: Decide Whether to DIY or Hire a Pro
Employ a Pro:
Hiring a professional contractor or designer like Decker Home Improvement is advised if your bathroom remodel requires extensive structural changes, electrical or plumbing work, or if you lack the requisite knowledge and expertise. They can make sure the project complies with all applicable building codes and laws. During a bathroom remodel, homeowners often need to move vanities, cabinets, or storage furniture out of the way, which is why many rely on professional services like California Furniture Shippers to handle bulky items safely and efficiently. During a bathroom remodel, homeowners often need to move vanities, cabinets, or storage furniture out of the way, which is why many rely on professional services like https://www.shiply.com/us/furniture-shipping/pennsylvania-furniture-shipping to handle bulky items safely and efficiently.
DIY: You might decide to take on the remodel as a do-it-yourself project if you have prior experience with home improvement and it is a reasonably simple remodel. On the other hand, be reasonable about your skills and ready to put in the time and energy necessary for planning and carrying out.
Step 5: Choose Materials and Fixtures
Plumbing Fittings:
Select fixtures that both fit your needs and style. This covers the faucets, shower or bathtub, sink, and toilet. Take into account water-saving solutions for a greener bathroom.
Flooring and Wall Materials:
Use water- and stain-resistant, long-lasting materials for your walls and floors. Examples include natural stone, waterproof vinyl flooring, and ceramic or porcelain tiles. Take into account each material’s maintenance and aesthetic requirements.
Countertops and Cabinetry:
Choose materials that are aesthetically pleasing as well as functional. Quartz, granite, and solid surface are common materials for countertops, and semi-custom or custom cabinetry offers individualized storage options.
Lighting:
The ambiance and functionality of bathrooms are greatly influenced by lighting. To make a room well-lit and welcoming, think about combining ambient, task, and accent lighting.
Step 6: Make a Storage Plan
Vanity Storage:
Make sure your vanity has enough room to store towels, toiletries, and other necessities so they are well-organized and at hand.
Extra Storage:
To make the most of available space and lessen clutter, think about adding extra storage options like built-in shelves, freestanding cabinets, or recessed wall niches.
Step 7: Ensure Adequate Airflow
In order to avoid mold and moisture-related problems, proper ventilation is necessary. Purchase a high-quality exhaust fan and make sure it’s fitted correctly to keep your bathroom’s airflow optimal.
Step 8: Select Finishes and Colors
Choose finishes and color palettes that go well with the design direction you have decided on. To create a cohesive and visually appealing bathroom, take into account elements such as hardware, cabinet finishes, wall paint, and tile colors.
Step 9: Acquire the Required Licenses
Permits from your local municipality might be required, depending on the extent of your bathroom renovation. To find out what permits and approvals your contractor or the local building department require, speak with them.
Step 10: Make a Project Timeline
Schedule your do-it-yourself project or collaborate with your contractor. Regarding the amount of time needed for each stage of the remodel, such as the demolition, plumbing, electrical, and finishing touches, be reasonable.
Step 11: Get Ready for Building
Make sure the bathroom and any surrounding areas are clear before construction starts. Keep dust and debris off of the furniture and floors in your house. While the remodel is underway, make temporary arrangements for toileting and bathing.
Step 12: Structure and Demolition Work
This is the phase where demolition and structural modifications happen if your project calls for them. During this phase, it’s critical to take care of any underlying concerns, such as plumbing or water damage.
Step 13: Electrical and Plumbing Tasks
It is best to leave plumbing and electrical work to certified experts. Verify that all connections and fixtures are installed correctly and adhere to local codes.
Step 14: Installing Walls and Flooring
After the electrical and plumbing work is finished, install the selected wall and flooring materials. An effective installation is essential to a long-lasting, waterproof bathroom.
Step 15: Installing Fixtures
Install plumbing fixtures, like the shower or bathtub, sink, and toilet. Make sure everything is connected and operating as it should.
Step 16: Installing Cabinets and Countertops
This is the stage where custom countertops and cabinets are installed, if that’s what you selected. To ensure a perfect fit, make sure all measurements are precise.
Step 17: Accessories and Lighting
Add mirrors, lighting fixtures, and any other accessories to your bathroom to make it more aesthetically pleasing and functional.
Step 18: Concluding Exams
Plan final inspections before the project is finished to make sure that everything complies with local building codes and regulations.
Step 19: Concluding Elements
To finish off the design of your renovated bathroom, add decorative elements, shower curtains, and towel bars.
Step 20: Take Pleasure in Your New Bath
Best wishes! The renovation of your bathroom is finished. Enjoy your newly designed area and remember all of the effort and thought that went into making it.
In conclusion, careful planning of a bathroom remodel necessitates taking your objectives, financial constraints, preferred style, and project’s practical aspects into account. Your home’s value will increase and your quality of life will be improved with a gorgeous and well-functioning bathroom that you can achieve by following these guidelines and hiring professionals when necessary, view the Decker Home Improvement’s website today.